If you just got braces, or if your teen did, one of the first questions that comes up is probably, “Okay, but how do I actually brush my teeth now?” It’s a fair question, and honestly, it’s one of the most important parts of successful orthodontic treatment.
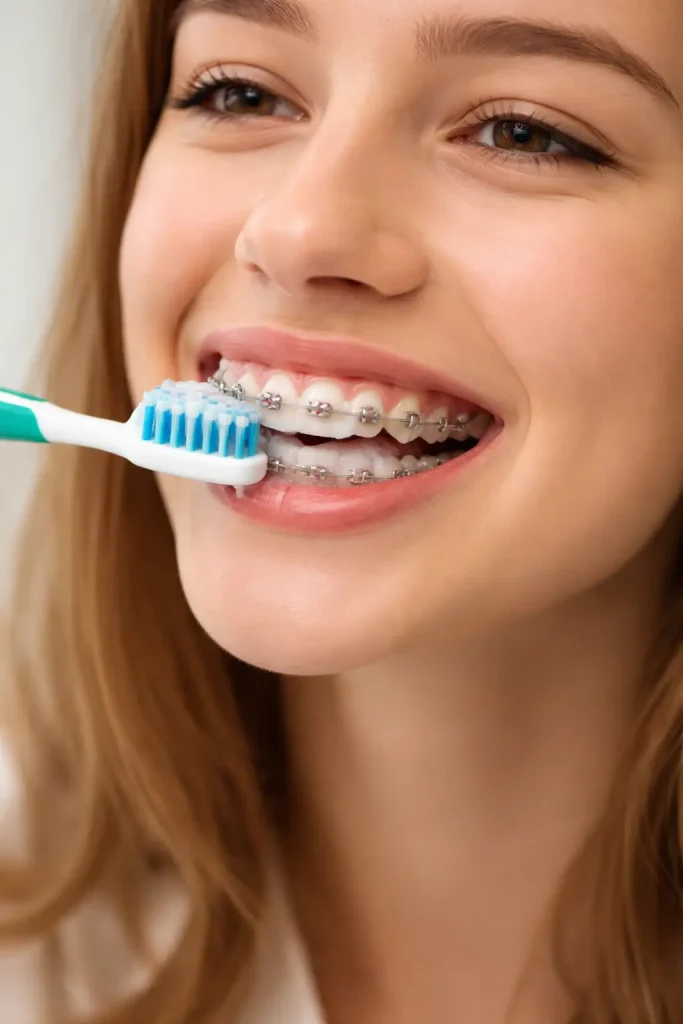
Here’s the direct answer upfront: brushing with braces requires a specific technique that targets brackets, wires, and gum lines to prevent plaque buildup, white spots, and cavities. You’ll need to brush after every meal, when possible, use the right tools, and spend a bit more time making sure everything is clean.
At Freedman & Haas Orthodontics, we don’t just put braces on and send you home hoping for the best. We teach every patient exactly how to brush with braces, what tools work best, and how to spot problems early. Let’s dive deeper into how to keep your teeth clean, healthy, and cavity-free while your braces do their job.
Why Brushing with Braces Requires Special Technique
When you have braces, your mouth suddenly has a lot more surfaces where food and plaque can hide. Brackets, wires, and elastic ties create nooks and crannies that weren’t there before. If brushing habits don’t adapt, plaque builds up around brackets, along the gum line, and under wires, which can lead to problems.
The most common issue we see is decalcification, those white spots or chalky patches that form around brackets when plaque sits against enamel for too long. These spots are permanent damage to the tooth surface and they become visible after braces are removed, which is heartbreaking after months or years of treatment. The good news is that they’re completely preventable with proper brushing.
Furthermore, braces make it harder for saliva to naturally rinse away food particles and bacteria. That means teeth are more vulnerable during orthodontic treatment, not less. If you brush the same way you did before braces, you’re leaving behind plaque that turns into acid, and that acid weakens enamel and inflames gums.
Another reason technique matters is that gums can become swollen or irritated when plaque accumulates around brackets. Puffy, bleeding gums are not a sign that braces are “cutting” your mouth, they’re a sign that plaque is irritating the tissue. Better brushing almost always solves the problem within a few days.
We hear this a lot: “My gums bleed when I brush, so I’m trying to be more gentle.”
Here’s the solution: bleeding gums are usually a sign you need to brush more thoroughly, not more gently. Use a soft-bristled toothbrush and clean around the gum line carefully but completely. If bleeding continues after a week of proper brushing, call us so we can check for other issues.
Best Toothbrushes for Braces
Choosing the right toothbrush can make a huge difference in how clean your teeth feel and how easy brushing becomes. Not all toothbrushes are created equal, and when you have braces, the right tool matters.
Manual Toothbrushes
A soft-bristled manual toothbrush can work great for braces if used correctly. Look for brushes labeled “soft” or “extra soft” because hard bristles can damage enamel and irritate gums. The brush head should be small enough to reach around brackets and into back molars without feeling bulky or awkward.
Some companies make orthodontic toothbrushes with a V-shaped bristle design that’s specifically cut to fit around brackets. These can be helpful, especially for younger kids or anyone who finds brushing with braces frustrating at first.
Electric Toothbrushes
Electric toothbrushes are often more effective than manual brushes for people with braces because they provide consistent, rapid motion that helps dislodge plaque. Many patients tell us they feel like their teeth are cleaner with an electric brush, and studies support that electric brushes can reduce plaque and gum inflammation more effectively than manual brushing.
If you choose an electric toothbrush, look for one with a small, round brush head and soft bristles. Brands like Oral-B and Sonicare both offer models that work well with braces. Some even have built-in timers to help you brush for the recommended two minutes.
If you are worried an electric toothbrush will knock your brackets off, don’t be! Electric toothbrushes are safe for braces when used properly. Use gentle pressure and let the brush do the work. Brackets are bonded securely to teeth, and normal brushing, whether manual or electric, won’t break them. What breaks brackets is biting into hard foods or applying excessive force, not routine brushing.
Specialized Brushes
In addition to your main toothbrush, consider adding a few specialized tools to your routine. An interdental brush, also called a proxy brush or Christmas tree brush, is a small, cone-shaped brush that fits between the wire and your teeth. These are fantastic for cleaning around brackets and under wires where a regular toothbrush can’t reach.
A floss threader or orthodontic flosser makes it easier to get floss under the wire and between teeth. Flossing with braces takes more time and patience, but it’s essential for preventing cavities between teeth.
A Waterpik or water flosser is another excellent tool. It uses a pressurized stream of water to flush out food particles and plaque from around brackets and along the gum line. Many patients find it easier and faster than traditional flossing, and it’s especially helpful for people who struggle with manual dexterity or just hate flossing.
Step-by-Step: How to Brush Teeth with Braces Properly
Now let’s get into the actual technique. This is the method we teach patients at Freedman & Haas, and it’s designed to clean every surface thoroughly without taking forever.
- Step 1: Rinse Your Mouth
Before you even pick up your toothbrush, rinse your mouth with water to loosen and wash away large food particles. This step takes five seconds and makes brushing much more effective because you’re not just pushing food around.
- Step 2: Apply Toothpaste
Use a fluoride toothpaste, which helps strengthen enamel and protect against cavities. You don’t need a huge amount, a pea-sized dollop is plenty. Some people prefer toothpaste specifically labeled for braces, but regular fluoride toothpaste works just fine.
- Step 3: Brush at a 45-Degree Angle
Position your toothbrush at a 45-degree angle to your gum line. This angle allows the bristles to clean along the gums and get under the edge of the brackets. Brush using small, circular motions rather than aggressive back-and-forth scrubbing.
- Step 4: Clean the Top of Brackets
Tilt your brush down and brush along the top edge of each bracket. Move from tooth to tooth methodically, making sure the bristles reach the area where the bracket meets the tooth.
- Step 5: Clean the Bottom of Brackets
Now tilt your brush up and clean along the bottom edge of each bracket, brushing where the bracket meets the tooth and the gum line. This area is particularly prone to plaque buildup, so spend extra time here.
- Step 6: Brush Chewing Surfaces
Brush the tops of your molars and premolars using back-and-forth or circular motions. These surfaces are easier to clean than the bracket areas, but don’t skip them.
- Step 7: Brush the Insides of Teeth
Don’t forget the inside surfaces, the part of your teeth that faces your tongue. These areas can collect plaque just like the outside surfaces. Tilt your brush vertically if needed to reach the inside of your front teeth.
- Step 8: Clean Around the Wire
Use gentle pressure to brush along and slightly under the wire. An interdental brush can be very helpful here for getting into tight spaces.
- Step 9: Brush for Two Minutes
Set a timer or use an electric toothbrush with a built-in timer. Two minutes ensures you’re giving each area enough attention. Divide your mouth into quadrants and spend 30 seconds on each section.
- Step 10: Rinse and Inspect
Rinse your mouth thoroughly with water and check your teeth in the mirror. Look for any spots you missed, especially around brackets and near the gum line. If you see leftover debris, go back and brush those areas again.
Pain point: “Brushing takes so long now, and I’m always in a rush.”
Here’s the solution: build brushing time into your schedule rather than treating it as an afterthought. Brush while you listen to music, watch a video, or during another part of your routine. Once you get the technique down, it becomes faster and more automatic.
Brushing Around Brackets and Wires
Brackets and wires are the trickiest part of brushing with braces, and they’re where most plaque buildup happens if you’re not careful. Let’s focus on how to clean these areas effectively.
The space between the bracket and the gum line is a prime spot for plaque to hide. Make sure your bristles reach this area by angling your brush down toward the gums. Use gentle pressure and small circular motions. If you’re using an electric toothbrush, hold it in place for a few seconds on each bracket to let the vibrations do the work.
The area directly under the wire is another challenge. You can’t get a regular toothbrush fully underneath, but you can angle the bristles to clean the tooth surface as much as possible. This is where interdental brushes shine. Slide the small brush between the wire and the tooth and move it gently back and forth to dislodge plaque.
Furthermore, don’t forget the areas where the wire attaches to the back molars. Bands or brackets on molars can trap food easily, and because they’re further back in your mouth, they’re easy to overlook. Make a conscious effort to reach these spots every time you brush.
If you notice that certain areas always feel fuzzy or look less clean, those are your weak spots. Spend a few extra seconds there during every brushing session until it becomes automatic.
Also, you can keep a small mirror in your backpack, purse, or locker and do a quick check after meals. If you see food stuck, a quick rinse or even a few swishes with water can help until you can brush properly. Also, consider carrying a travel toothbrush for emergencies.
Additional Cleaning Tools for Braces Wearers
Brushing alone isn’t enough. To keep your teeth truly clean and healthy during braces treatment, you’ll need a few additional tools in your arsenal.
Flossing Tools
Flossing with braces is not optional, it’s essential. Floss removes plaque and food particles from between teeth where your toothbrush can’t reach. Without flossing, you’re at high risk for cavities between teeth.
Traditional floss works, but you’ll need a floss threader to get the floss under the wire. Thread the floss, slide it between two teeth, and move it up and down along the sides of both teeth and under the gum line. Then pull it out and move to the next pair of teeth. Yes, it takes time, but it’s worth it.
Orthodontic flossers or floss picks designed for braces can make this process faster. They have a rigid end that slides under the wire more easily than traditional floss.
Water Flossers
A Waterpik or similar water flosser is a gamechanger for many braces patients. It uses a stream of pulsing water to clean between teeth and around brackets. It’s faster than traditional flossing and can be more effective at removing debris.
Use the water flosser on a medium setting and aim the stream at the gum line and between teeth. Move systematically around your mouth, spending a few seconds on each area. Many patients find this so much easier than threading floss that they’re more likely to do it consistently.
Interdental Brushes
As mentioned earlier, these small brushes fit into tight spaces around brackets and under wires. Keep a few on hand and use them after meals or whenever you feel like you have food stuck. They’re small enough to carry in a pocket or purse and can be reused several times before needing replacement.
Fluoride Mouthwash
A fluoride mouthwash adds an extra layer of protection against cavities. Rinse with it once a day, preferably at night after brushing and flossing. The fluoride helps strengthen enamel and can reach areas that brushing might have missed.
Look for mouthwashes labeled “anticavity” or “fluoride rinse.” Avoid mouthwashes with alcohol if they cause dryness or irritation.
If you floss, and your gums still bleed, you have to know that bleeding gums during flossing usually means you haven’t been flossing regularly enough. Stick with it daily for a week, and the bleeding should decrease significantly. If it doesn’t, call us to check for gum inflammation or other issues.
How Often Should You Brush with Braces?
Ideally, you should brush after every meal and snack, which usually means three to four times a day. Morning after breakfast, after lunch, after dinner, and before bed. If you snack between meals, brush or at least rinse thoroughly afterward.
We know that brushing after every meal isn’t always realistic, especially at school or work. If you can’t brush, at least rinse your mouth vigorously with water to wash away food particles. Chewing sugarless gum can also help stimulate saliva and clean teeth temporarily, but it’s not a substitute for brushing.
At a minimum, brush thoroughly twice a day: once in the morning and once before bed. The nighttime brushing is especially important because saliva production decreases while you sleep, which means your teeth are more vulnerable to plaque and acid overnight.
Furthermore, don’t skip brushing just because your teeth feel sore after an adjustment. Soreness is normal and keeping your teeth clean actually helps reduce gum irritation. Use a soft-bristled brush and be gentle, but don’t avoid brushing altogether.
If you think your kid isn’t brushing enough, and you’re worried about cavities.Make brushing non-negotiable, just like buckling a seatbelt or doing homework. Set timers, create a checklist, or use a brushing app with rewards. If needed, supervise brushing for a few weeks until the habit sticks. Also, bring your child in for regular cleanings and checkups so we can monitor oral health and reinforce the importance of good hygiene.
Common Mistakes When Brushing Teeth with Braces
Even with good intentions, it’s easy to make mistakes when brushing with braces. Here are the most common ones we see and how to avoid them.
Brushing Too Quickly
Two minutes feels long when you’re brushing, but it’s necessary to clean all the surfaces around brackets and wires. Rushing through brushing leaves plaque behind. Use a timer or play a song that’s about two minutes long to help you stay on track.
Using Too Much Pressure
Brushing harder doesn’t mean brushing better. Excessive pressure can damage enamel, irritate gums, and even bend wires or loosen brackets. Use gentle, controlled motions and let the bristles do the work.
Forgetting to Brush the Gum Line
The area where your teeth meet your gums is critical. Plaque that sits along the gum line causes inflammation, bleeding, and eventually gum disease. Angle your brush toward the gums and clean this area carefully during every brushing session.
Skipping the Backs of Teeth
The inside surfaces of your teeth are just as important as the outside, but they’re easy to forget. Make it a habit to brush the backs of your teeth during every session, even though they don’t have brackets.
Not Replacing Your Toothbrush Often Enough
Braces are tough on toothbrush bristles. They wear out faster than they would without braces. Replace your toothbrush every two to three months, or sooner if the bristles start to fray. A worn-out toothbrush doesn’t clean effectively.
Relying Only on Brushing
Brushing is essential, but it doesn’t clean between teeth. You must floss or use a water flosser to remove plaque and food from areas your toothbrush can’t reach.
If you brush carefully but still get white spots around your brackets you should know that white spots form when brushing misses certain areas consistently, usually around the edges of brackets. Focus extra attention on these spots, brush at a 45-degree angle to clean along the bracket edges and consider using a fluoride mouthwash daily. If white spots are already forming, let us know during your next visit so we can intervene early.
Conclusion
Brushing teeth with braces requires a bit more time, effort, and technique than brushing without them, but it’s absolutely manageable once you get into a rhythm. Brush after every meal when possible, use the right tools like a soft-bristled or electric toothbrush, interdental brushes, and floss or a water flosser, and spend a full two minutes cleaning all surfaces, including around brackets, wires, and gum lines.
Good brushing habits during braces treatment protect your teeth from cavities, white spots, and gum problems. They also make sure that when your braces come off, you’re left with a beautiful, healthy smile rather than permanent damage.
At Freedman & Haas Orthodontics in West Palm Beach, Wellington, and Indiantown, we’re here to support you through every step of treatment. If you’re struggling with brushing technique, if your gums are irritated, or if you just want to make sure you’re doing everything right, don’t hesitate to ask during your next visit. We’re always happy to demonstrate, troubleshoot, and help you succeed.
Ready to start braces treatment or need personalized guidance on keeping your teeth clean during orthodontics? Schedule a complimentary consultation with us at Freedman & Haas Orthodontics. We’ll make sure you have the tools, knowledge, and support you need to protect your smile every step of the way.